Quick Search
How to use and configure Quick Search.
Quick Search
Quick Search is a productivity tool which can save each member of your team ~30+ mins per day by reducing the time it takes to look up information.
Read on to see a demo of how Quick Search works in action, along with all the unique features which make our product standout from the rest.

Getting Started
To get started with Quick Search, you'll need to install the Context Menu Enterprise Google Chrome extension or Firefox add-on, then activate your 30 day free trial or pay for your subscription. For more details on this, see our Getting Started docs.
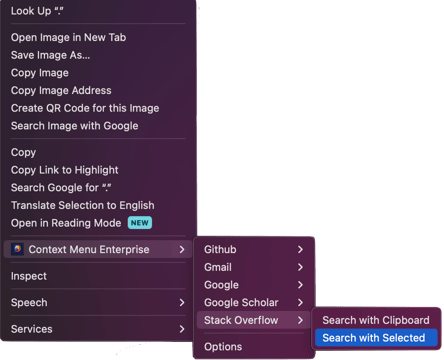
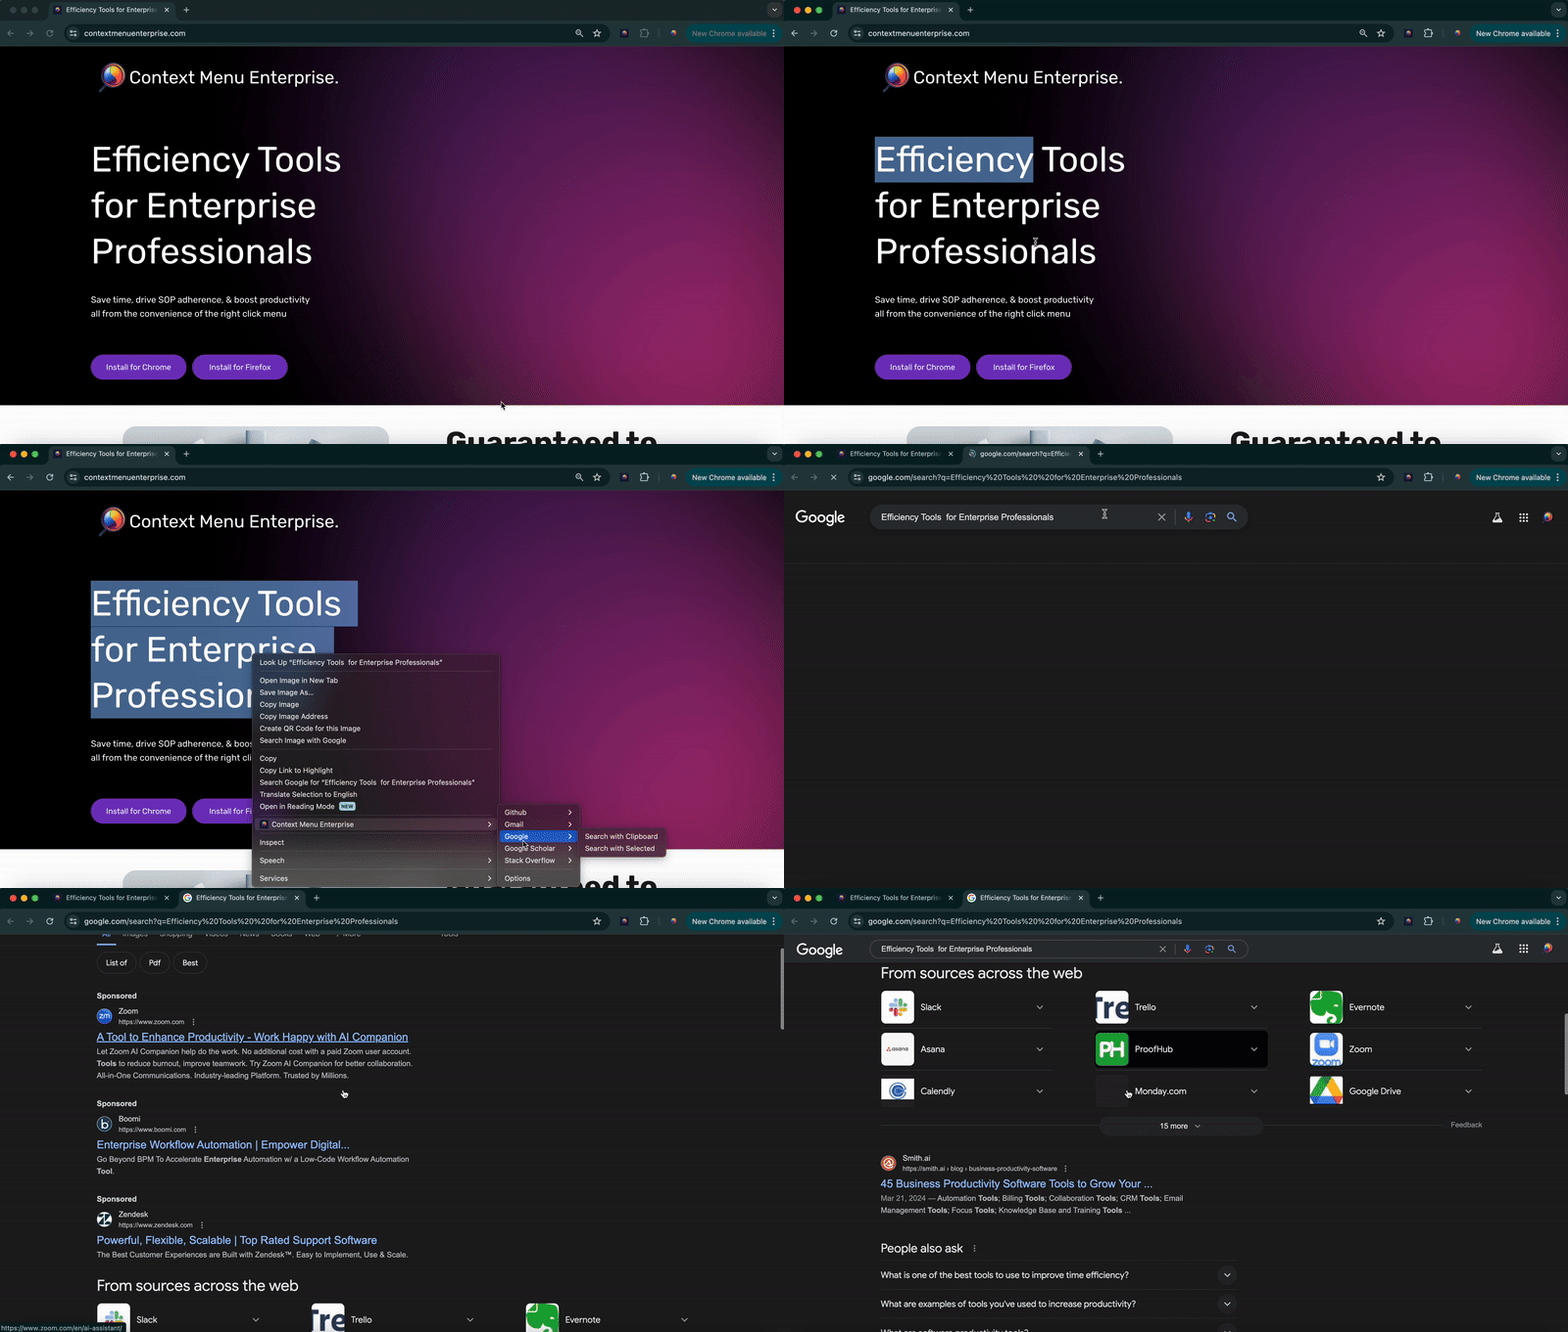
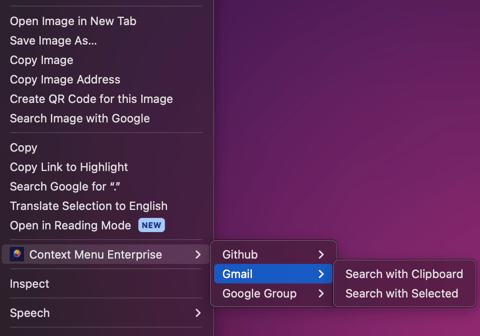
Once your account is activated, a demo version of Quick Search is ready to use. To test it, simply copy a word or phrase of text, or highlight in your browser, right click in your browser, and navigate the context menu to your search. Select Search with Clipboard or Search with Selected, then watch as your new tab opens automatically searching the contents you copied or highlighted.

Bundle Searches
Bundle searches allow your team to
perform multiple searches at the same time with just a single click. They're one of the unique features of Quick Search which our competition does not have and were developed with feedback and insight from enterprises. Not only do bundle searches result in even more time savings for your team, but they also provides a mechanism to ensure SOPs and best practices are followed. Let's review some common bundle search use cases below so you can understand how.


How to Build a Bundle Search
Ok, so now that you've heard all about the use cases and potential for bundle searches, let's see how to build them.
Add Bundle Search button
Bundle searches are super simple to build. They're basically like a group, or "bundle" of single searches which share the same title. Here's the step by step.
Either identify an existing search which you will convert to a bundle, or add a new single search to your menu by clicking the + Add Search button.
Click the "Add Bundle Search" button in the menu line you have added / selected. You will see a new empty Search URL field appear below the existing one.
Input your additional search just as you would any other search.
Repeat steps 2 and 3 for as many searches you would like to include in your bundle.
Update or input a title for this bundle search.
Click Save and start searching!
Add Sample Searches Method
Bundle searches can also be added / created by selecting multiple searches in the Add Sample Searches section. For more details on this, see the Add Sample Searches section in this document below.
Deleting Bundle Searches
Individual searches within your bundle can be deleted by clicking the trashcan icon next to them. To delete the entire bundle search, click the Delete button for that menu line.
Bundle Search Use Cases
Bundle searches are used whenever you know multiple searches are needed with the same input value. They're used by essentially every team - sales, support, engineering, etc. - for a variety of specific use cases, but one of the most common is technical troubleshooting.
Using Bundle Searches for Technical Troubleshooting
Whether you're troubleshooting a customer issue as a Support engineer or an internal database issue as a member of the R&D team, it's a guarantee you'll be searching for information to confirm or discover what the problem could be. For example, let's say you're a Technical Account Manager (TAM) and one of your customer's just reported an error code they're receiving. As the TAM, it's your job to figure out what's wrong and respond to your customer. You know you need to lookup several things related to the error code which you always check like:
- the documentation for the error code to confirm what it means
- the number of times the error has occurred for this customer in the past 24 hours
- the number of times the error has occurred across all accounts in the past 24 hours (is their a widespread issue)
- if the error code is mentioned in any recent Stack Overflow posts
- if the error code is mentioned in your company's Github Issue repository
- if any open bugs mention the error code in JIRA
- if the error code is mentioned in your company's internal knowledge base "wiki" docs
Looking up all of these searches, even with Quick Search, takes some time, but with a bundle search, they are all done at the same time in just a couple seconds.
Other Bundle Search Use Cases
Bundle searches can be used for many other use cases besides technical troubleshooting as well. For example, maybe your Sales team has 5 or 6 different lookups they perform for every new prospect, or maybe they just need to open up many different forms which need to be completed to add a customer into Salesforce. With Bundle Search, this can all be consolidated into a "bundle" and everything opened with just a single click, which of course saves valuable time, but also, ensures steps and SOPs are not forgotten.
Driving SOPs, Best Practices, and Making Sure Steps are Not Forgotten
Bundle searches don't just save time. One of their most important value propositions is that they help drive SOPs and best practices, ensuring every step is followed and every resource is checked. Whether your a new hire or a veteran employee, everyone forgets things sometimes or at least takes some time and practice before it's second nature. Maybe there's a new SOP or process, or your team has gotten lazy and you need to re-enforce an existing methodology which ensures everyone checks every potential resource before escalating an issue. Whatever the case, Bundle searches can help.
Let's say your team has a documented troubleshooting methodology which your Support engineers must followed before opening a JIRA and escalating an issue to engineering. The methodology says something like "before opening a JIRA ticket with our team, you must try to find the answer to your issue by checking Slack threads, Salesforce KBs, Zendesk tickets, JIRA tickets, internal Confluence wiki docs, public facing docs, Google, Stack Overflow posts, and Github issues." Recently, your engineers have been getting frustrated because this methodology is not being followed by the Support team, and the relationship between the teams is breaking down.
This is where bundle searches can really shine. By just taking a few minutes to build a bundle search which includes a search to every resource in your troubleshooting methodology, it becomes much much easier to ensure these resources are checked as your team doesn't have to remember each one, they can simply search them all with one click.
An Aid for Ticket Notes
Continuing on the example above where your team must lookup all the resources in your troubleshooting methodology - now let's say your leadership team also requires that the results of these searches be included in the ticket as ticket notes. Well that becomes much easier to accomplish with a bundle search.

∑ Sigma Series Searches (Advanced Usage)
A ∑ sigma series search, or sigma search for short, is a
type of search which allows you to dynamically populate and format a series of space-separated values into your search URL. This type of search is a bit more complicated to understand, so we recommend building a few standard searches for practice before trying a sigma search. The concept of a sigma search will make more sense after some experience working with different use cases and search URLs.
If you're ready to learn about sigma searches, then let's walk through the step by step.
Step by Step for Creating a Sigma Search
Add a new search to your menu.
Add a title to your search.
Get the URL of an existing manually-created search which you want to replicate as a sigma search (see Kibana example below for more details).
Replace the search query values with a search variable (either %s or searchterms).
Copy and paste this URL into the URL field of your new Quick Search menu entry.
Set your cursor directly before your search variable in your search URL. Make sure your cursor is blinking at this spot. This is where your sigma symbol will be inserted indicating the beginning of the series.
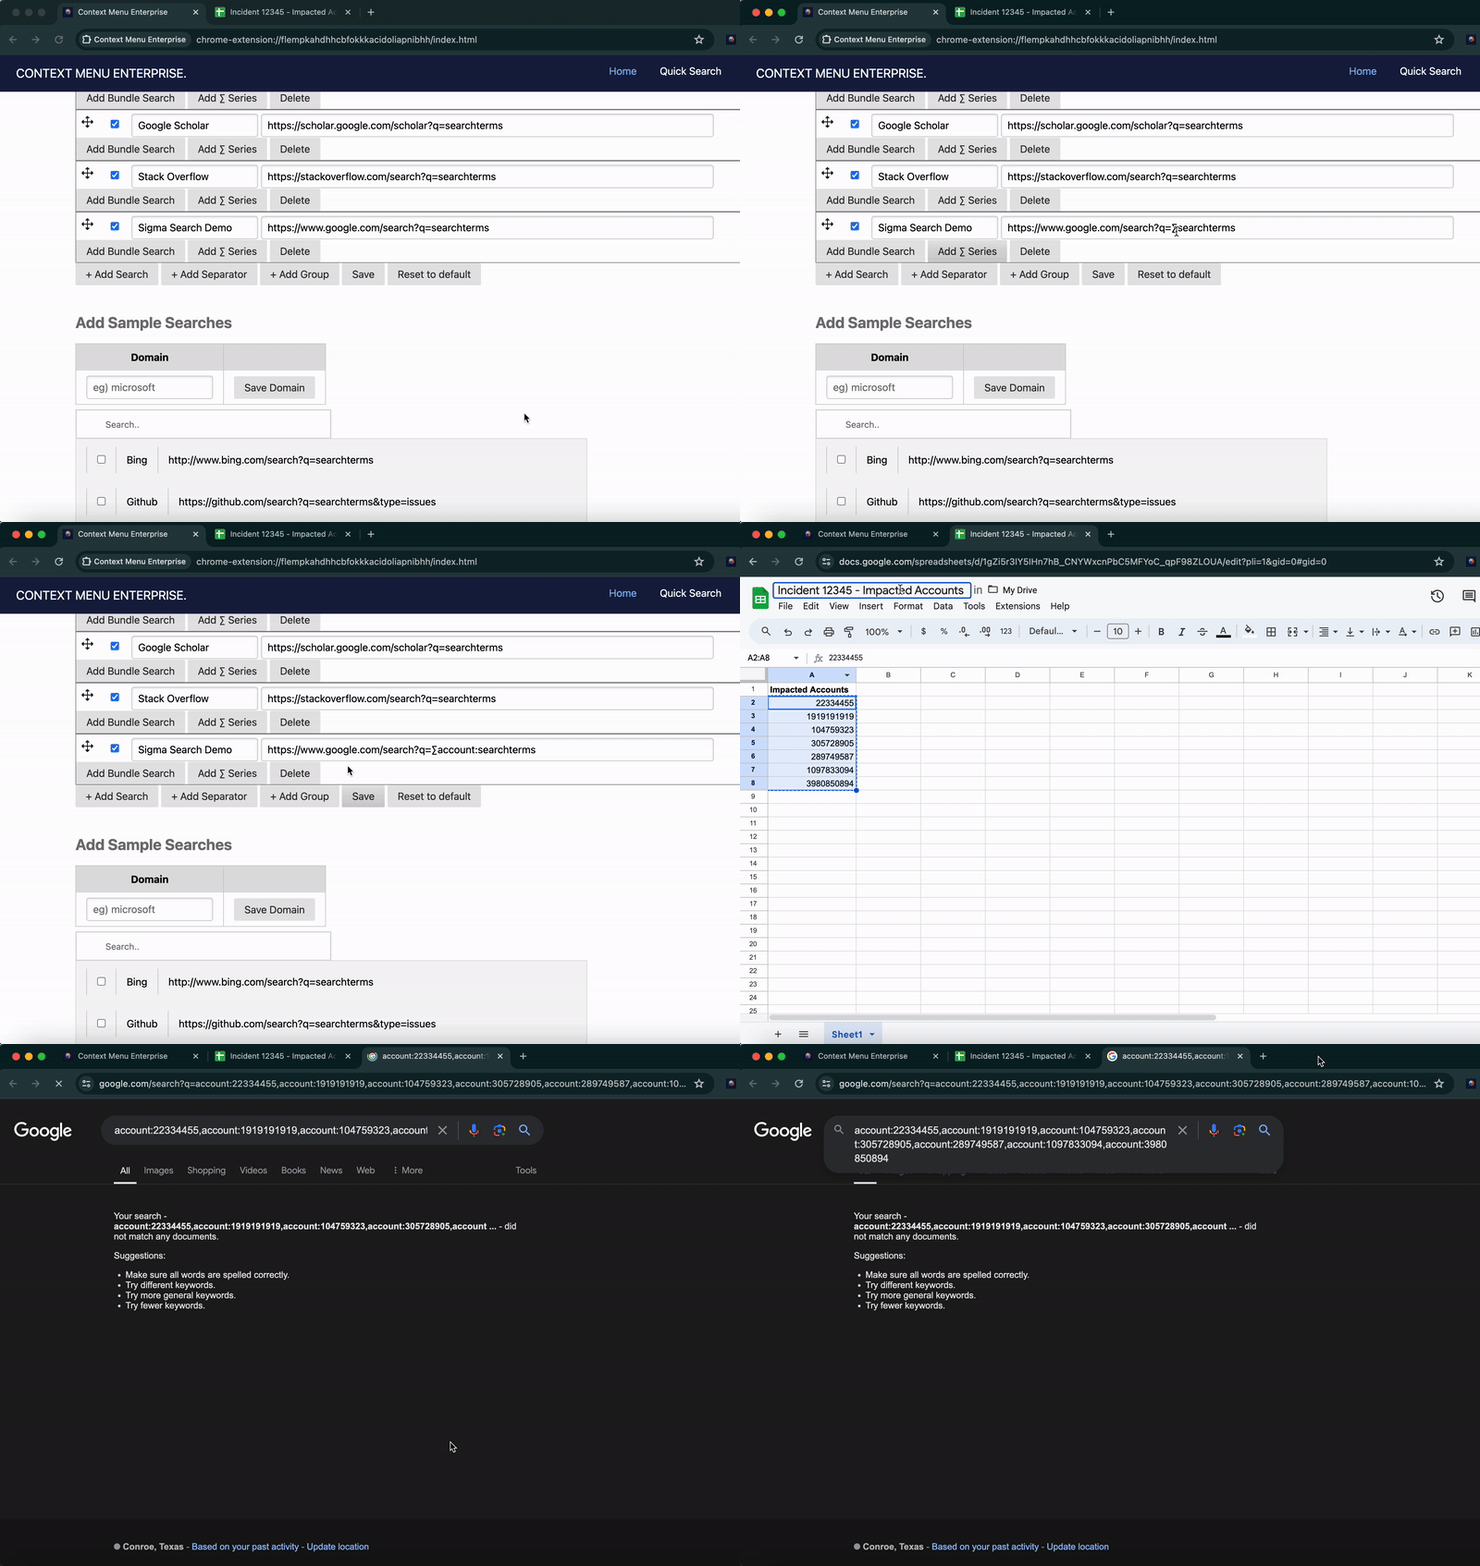
Click the Add Σ Series button. You should see the sigma symbol, Σ, inserted where you cursor was. This is the beginning of your series. If no other changes are made, your series will add a comma between each value in the list (ie this is the default behavior).
Default Example)
∑%s --> result = <value 1>, <value 2>, <value 3>, ...(Optional) Input any needed prefix between Σ and your search variable. This is determined by the URL requirements from the webpage you are searching. For example, some search URLs may require a %22 between each value (the %22 symbol is a space character within URLs). Another couple examples are filter: and account:.
Examples)
∑account:%s --> result = account:<value 1>, account:<value 2>, account:<value 3>, ...
∑%22:%s --> result = %22<value 1>, %22<value 2>, %22<value 3>, ...Click Save and start searching!
Example) Kibana Sigma Search
Often the best way to learn something is with a real world
example, so let's go through one together to demonstrate
the steps above!
Imagine your enterprise uses Kibana to make your
database accessible to employees and you need to build
a search to quickly lookup metrics for a list of thousands
of accounts impacted by a certain instance (maybe your
enterprise really does this!). You already have a list of the
accounts but they're in another tool such as a CSV, Google
Sheet, or similar report. As is often the case, there's no convenient way to copy these into your database search query and manually adding all the accounts into the query would take ages.
This is where a sigma search can save the day. With sigma search, you can build a search URL which will allow your team to copy a list of accounts of any length directly from Google Sheets or Excel, then perform a search against all of them at once.
To begin setting up our sigma search, the first thing we need to do is get the URL of an existing manually-created search. To get this URL, we will build a search report similar to how we have always done it. We formulate the columns and sorting as we need and add in the relevant filters and search parameters, but we do this on a smaller scale. While our sigma search will be able handle thousands of account numbers, our manually created search only needs 2 or 3 since we are just using it to get the general format and syntax of the URL.
**One important note about filters - Kibana has a limit on the number of filters and values you can search at one time through their default search bar / filters. Since we want our sigma search to support more than 100 account numbers at once, we will use a Query DSL filter.
Ok, now that we have our manual search created with and it's filtered and sorted with
all the columns that we like, we are ready to copy the URL. For some resources, this
would mean simply copying the current URL, but for Kibana, that doesn't work
because we need the direct link to the exact page we're viewing with all the filters
and sorting included. To get the direct link, we click Share from the toolbar,
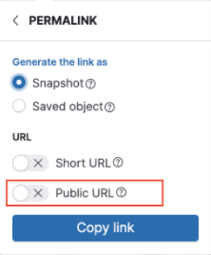
select Get links, leave Snapshot selected, then click Copy link.
In this example, we have added 3 account numbers, 34512122,10294758,009182742
within a Query DSL filter, and this is what our link looks like:
https://kibana.us1.contextmenuenterprise.com/database-internal/app/kibana#/discover?_g=(filters:!(),refreshInterval:(pause:!t,value:0),time:(from:now-1w,to:now))&_a=(columns:!(_source),filters:!(('$state':(store:appState),meta:(alias:'Multi+Account+Search+Filter',disabled:!f,index:e6754050-0a40-11ea-98d5-23817bb73bfe,key:query,negate:!f,type:custom,value:'%7B%22bool%22:%7B%22filter%22:%7B%22terms%22:%7B%22account%22:%5B%2234512122,%2210294758,%22009182742,%22%5D%7D%7D%7D%7D'),query:(bool:(filter:(terms:(account:!(34512122,10294758,009182742))))))),index:e6754050-0a40-11ea-98d5-23817bb73bfe,interval:auto,query:(language:kuery,query:''),sort:!(!('@timestamp',desc)))
Notice how the list of accounts are included in two different places in the URL, and the first occurrence of the accounts has %22 in front of each account number. %22 is how a space character is represented in a URL.
Ok, so the hard part is done. We've got the URL we need to build our sigma search. The rest is easy from here. All we do next is simply replace the two occurrences of the account numbers with our sigma series symbol ∑ (this indicates the start of the series), followed by your preferred search variable, %s or searchterms. And for the first series, we will also add a %22 between the ∑ symbol and the search variable which will add a %22 before each of the account numbers when Quick Search works it's magic.
This is what our sigma search looks like when it's ready to save in our Quick Search menu:
https://kibana.us1.contextmenuenterprise.com/database-internal/app/kibana#/discover?_g=(filters:!(),refreshInterval:(pause:!t,value:0),time:(from:now-1w,to:now))&_a=(columns:!(_source),filters:!(('$state':(store:appState),meta:(alias:'Multi+Account+Search+Filter',disabled:!f,index:e6754050-0a40-11ea-98d5-23817bb73bfe,key:query,negate:!f,type:custom,value:'%7B%22bool%22:%7B%22filter%22:%7B%22terms%22:%7B%22account%22:%5B∑%22%s%22%5D%7D%7D%7D%7D'),query:(bool:(filter:(terms:(account:!(∑%s))))))),index:e6754050-0a40-11ea-98d5-23817bb73bfe,interval:auto,query:(language:kuery,query:''),sort:!(!('@timestamp',desc)))
And that's it! From here we simply copy and paste this sigma search URL into our Quick Search menu, give it a title, click Save and we're ready to start saving major amounts of time with our searches!



Add Samples Searches
Add Selected Button
To add one or more of the sample searches to your Quick Search menu "individually", as opposed to a bundle, simply select the checkbox for the searches you wish to add, then click the Add Selected button.
Configuring a Domain
As you may already know, non-publicly accessible searches (e.g. internal databases) require your enterprise's domain within the URL to work. The Sample Search Domain Configuration allows your team to configure this domain, so it will be automatically populated when you add the search to your menu.
Create Search Bundle Button
To create a new bundle search from two or more searches in the sample search repository, simply select the checkbox for the searches you wish to add in a bundle, then click the Create Search Bundle button.
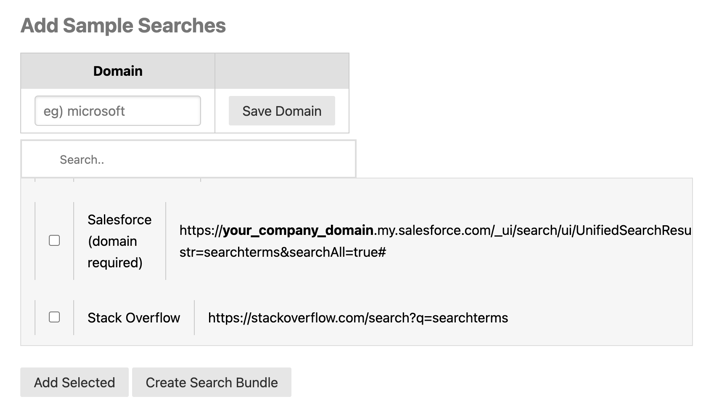

While most customers create their own searches from scratch, Quick Search also comes with several sample searches which can be easily added to your Quick Search menu individually or as a bundle.
Settings
Another way you can customize your Quick Search menu, and it's behavior, is with the Quick Search Settings. Simply select the checkbox next to each setting to enable it, or uncheck to disable, then click Save.
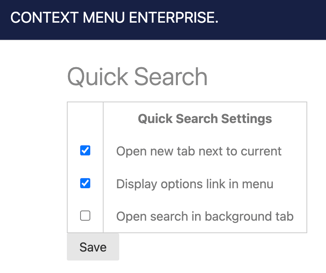

Open new tab next to current
This setting ensures the tabs your Quick Search opens are directly next to your active tab. If you prefer your tabs open from the furthest right of all your tabs, i.e. the last tab position, leave this setting disabled.
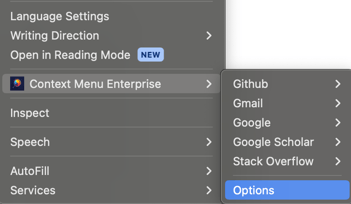
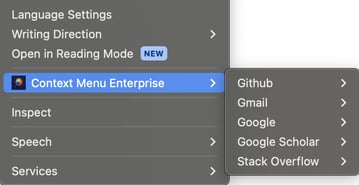
Display options link in menu
When enabled, this setting adds a link to your Options & Configuration page at the bottom of your Quick Search menu (only visible when you open up your right-click / context menu) for quick access.
Open search in background tab
This setting ensures tabs are opened in the background rather than becoming your active tab. In other words, if this setting is not enabled, when you click a search in your menu, your window will switch over to that new tab that is opened. If you do not plan to use the new tab immediately, or you find yourself frequently opening multiple tabs at once and don't want to have to switch back to the original tab each time, then you'll want to enable this setting.


Reset to Default
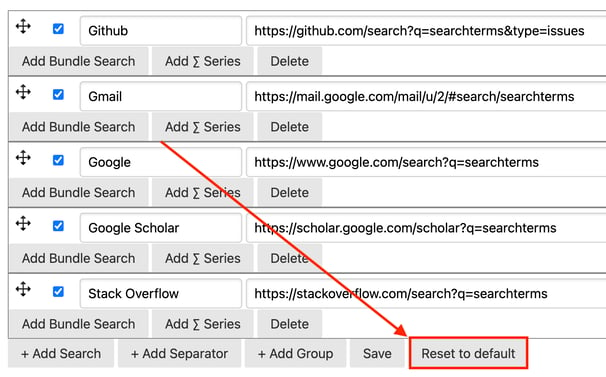
Another Quick Search feature which can come in handy is the Reset to default button.
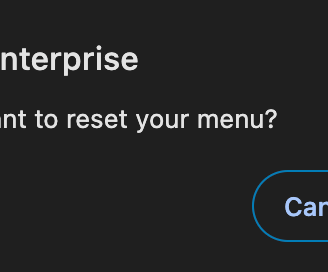
When pressed, this button will ask you if you're sure you want to reset, then update the menu back to the original sample menu that comes with Quick Search when you first download the extension.


Organizing Your Quick Search Menu
Drag 'n Drop
In case you didn't notice, each entry in your Quick Search menu can be reordered by a simple drag 'n drop. To do this, click on the drag 'n drop icon or any whitespace in the row then drag your cursor to the desired menu position.
Separators
Another way to organize your Quick Search menu is by creating sections with separators. To add a separator, simply click the + Add Separator button, then drag 'n drop to your desired menu position and click Save.
Disabled Searches & Headers
Another useful way to organize your Quick Search menu is by disabling lines which in turn become headers. You may use this to title a section or perhaps for your team's own internal version tracking of your customized menu.
To disable a line in your menu, simply unselect the checkbox for that line. You'll then see that line "greyed out" or disabled when you right click and view your Quick Search menu.
Groups (also known as Folders)
Another powerful way to organize your menu and make it faster to navigate is with Groups, also known as Folders. Groups allow you to create submenus, so instead of having one long list of all your items, you have a shorter list which is easier to read and only when you hover above the group header do the searches in that group appear. Even if you are using disabled search headers and separators, groups are a vital tool to keep your menu clean, especially as you the length of your menu inevitably grows over time.
To create a group, click the + Add Group button, then add new lines for searches in that group with the Add Search to Group button. To delete a search from the group, click the trashcan next to that search.
Group Search Headers
Similar to a disabled search header, you can also add headers to your Groups by simply leaving the Search URL blank for that particular search within a group. In this way, you're able to add what are essentially sub-headers within your group.
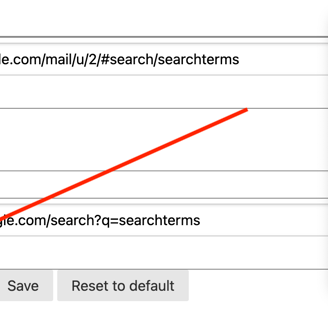
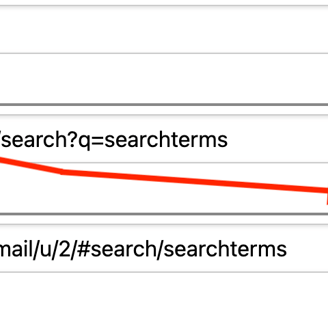
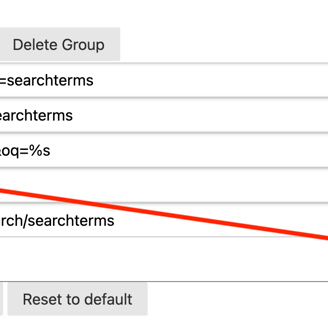
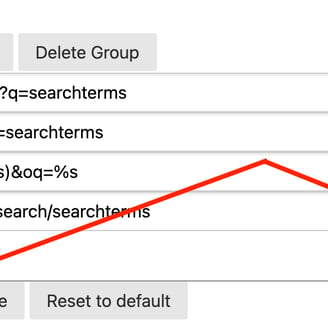
Functionality isn't the only way you can customize your Quick Search menu. You can also customize some aspects of the appearance and organize it in a way that is easier and faster for your team to read and use.




Quick Search Usage (How to Search)
Using Quick Search couldn't be simpler. Here's how.
Identify what you want to search with. This can be anything as long as it's relevant and applicable to the search or searches you need to do. It may be an account number, an error code, a ticket number, a phrase, even a paragraph of text.
Decide how you will perform the search. There are two options - Search with Clipboard and Search with Selection.
Search with Selection: This search method will search with whatever you have selected, i.e. highlighted, in your browser webpage. You will only see this search method when you open your context menu with something selected on the webpage.
Search with Clipboard: This search method will use the current value you have copied to your clipboard. You will always see this option (i.e. whether you have a selection on your webpage or not). This approach is convenient if you're copying a value from an application other than your browser such as Slack or Microsoft Word.If you are searching with selection, highlight what you will search in your browser (tip: this can often be done by double clicking to save time), then open the browser context menu by right clicking on your selection (make sure your selection remains highlighted).
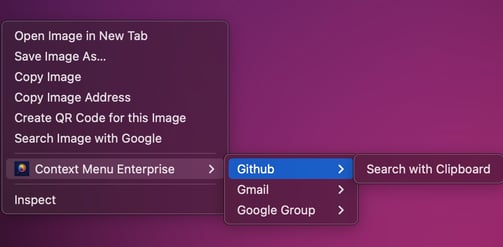
If you are searching with clipboard, right click anywhere in your browser window to open your context menu (this may need to be a non-input / editable section of the webpage),Move your cursor over Context Menu Enterprise in your context menu, and you will see your Quick Search menu open up.
Move your cursor over the search you would like to make. If your search is within a group, move your cursor over the group title, then the search you would like to make.
You should now see either Search with Clipboard, or both Search with Clipboard and Search with Selection. Click whichever option contains the value you would like to search.


Import/Export (Raw Quick Search Configuration)
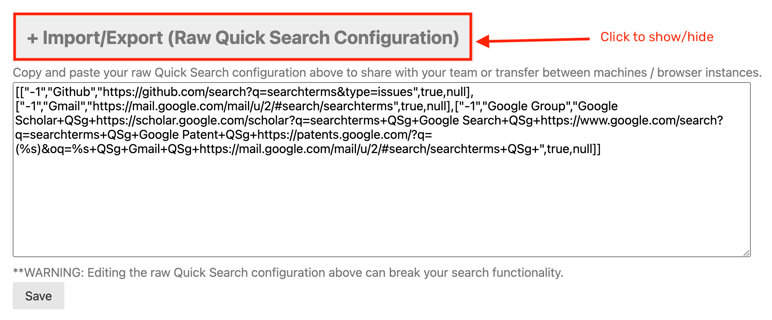

The Import/Export feature of Quick Search is how
you can share your menu configuration with others
or update your menu to match your team without
manually creating each search. It can also be used
to copy your menu between browsers (e.g. Chrome
to Firefox).
Here's how to use it.
Click on + Import/Export (Raw Quick Search
Configuration) to show the configuration. By
default, it will be collapsed and hidden.If you're importing new configuration, delete the configuration, then paste in the new configuration and click Save. You should see the new menu as soon as you click Save.
If you're exporting your menu to share with your team (e.g. if you're the admin for your team), just copy the entire block of configuration text, then send it to your team.When you're done, it's recommended to hide the configuration if you are not actively importing or exporting to avoid potentially editing the raw configuration text and seriously breaking your menu.
Tips, Troubleshooting, & Support
Below are some tips and troubleshooting guidance to help you and your team get the most from Quick Search.
Quick Search Usage Tips
Below are some general tips and things to watch out for when using Quick Search.Depending on the webpage you're viewing, the right click menu may be different. In order to use Quick Search, you need to right click on a page which opens your browser's context menu. Some programs and websites have overlays which will show their own context menu (e.g. Google Sheets) and you won't see Context Menu Enterprise listed.
In cases like this, you can copy the text from the webpage, switch to a different tab which opens your browser's context menu, and search with your clipboard.Use the Search with Clipboard option when the value you're searching with comes from another desktop application such as Slack, Outlook, Microsoft Word, or something else.
Finding the Search URL
This can be one of the most challenging parts of building a robust Quick Search menu for your team. Not every cloud service, website, or database supports searching via URL but most do. Here are some tips for how you can find the search URL for you and your team.Perform a search manually and check if the URL includes your search query. If it does, then copy the URL and replace the query with a search variable.
If a search query doesn't show up in the URL, check for settings or a share button which might have it instead (e.g. Kibana only includes the search query when you get the URL from the share button).
Sometimes a webpage may support searching via URL but it's not obvious or documented. In this cases, search the docs and forums for that webpage and guess and check to figure out the format. Salesforce for example is not an obvious format, but our team eventually figured out with in the format: /_ui/search/ui/UnifiedSearchResults?str=searchterms&searchAll=true#
If you can't figure out the search URL for a webpage or resource your team needs, contact our Support, and we'll investigate for you. In some cases, webpages may not support URL searches but instead require an API. If this is the case, our Support team may be able to add to our API-search private beta.
Organizing Your Quick Search Menu
It's highly recommended to organize your menu into logical groups to maximize efficiency for you and your team. Making your team more efficient is our mission here at Context Menu Enterprise, and we'd hate to see your team adding extra seconds every time they search just because your menu is messy, unorganized, and hard to read.Create groups (aka folders) to organize primary types of searches. For example, all of your Salesforce searches can go in one group, Kibana can go in another, Public searches in another, etc. How you organize is ultimately up to you and the searches your team uses, but we recommend taking advantage of this feature in whatever way makes sense for your team.
Use separators and/or disabled headers to organize further both outside of and within groups.
Add a version header to the top or bottom of your search menu, so your team can know which version they are using and know if they need to upgrade or not.
Team Usage
The below tips are related to how you manage your Quick Search menu for your team. These tips come from first hand success and feedback from other enterprises to see what really works.It's recommended to have one or more admins manage versions of the menu for your team. Your admin can collect feedback from the team and leadership to add and modify searches, then share the version with your team via the Import/Export feature.
Your admins should work with leadership to build your SOPs and best practices into your menu. For example, your troubleshooting methodology which contains all the resources an agent should check before escalating could be built into a bundle search or group.
Having trouble with something else?
Click here to contact our Support.
We'd be happy to help.


